Manage Included Permission Sets in Permission Set Groups via Summaries
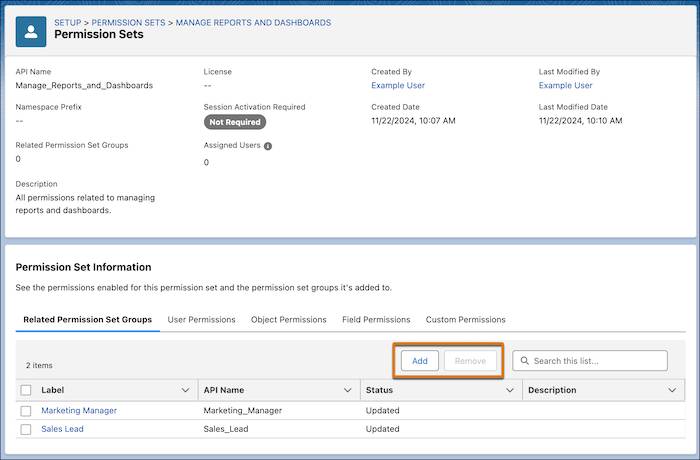
Update user access more efficiently by specifying which permission set groups include a permission set directly from the permission set’s summary. Previously, to manage included permission sets, you were required to navigate to each permission set group’s page.
From Setup, in the Quick Find box, enter Permission Sets, and select Permission Sets. Select a permission set, and then click View Summary. In the Related Permission Set Groups tab, click Add or Remove.
This change applies to Lightning Experience and Salesforce Classic (not available in all orgs) in Contact Manager, Group, Essentials, Professional, Enterprise, Performance, Unlimited, Developer, and Database.com editions.
Sort List Views by Multiple Columns
To see your data in a more intuitive way and make your list views more actionable, you can now sort list views on object home pages by up to five columns. Select the columns to sort by and whether to sort each column in ascending or descending order. To return to sorting by a single column, click a column header that isn’t included in your multiple-column sort. Sorting by multiple columns affects only your user preferences, and you can’t save your multi-column sorting configuration as a default.
To sort a list view by multiple columns, from a list view, click  and select the columns to include in the sort. Click Apply.
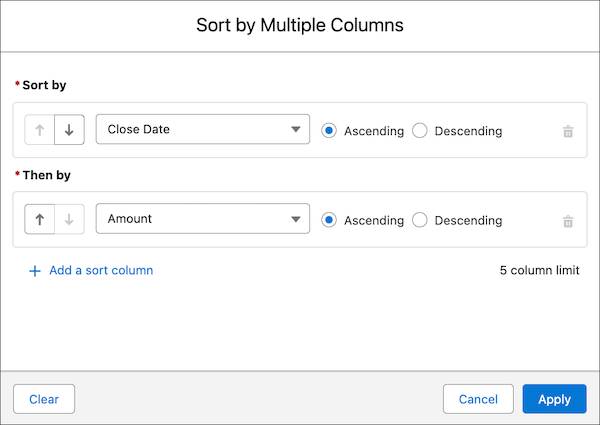
For example, create an Opportunities list view sorted by Close Date and then by Amount. Or create a Cases list view that’s sorted by Contact Name, then by Priority, and then by Date/Time Opened. Your list sort configuration is saved until you modify or clear it. To return to the default sort order, click  , and then select Reset Column Sorting.


Get Hands-on with the View All Fields Permission
Step 1: Create a New Permission Set
-
Navigate to Permission Sets:
- From Setup, in the Quick Find box, type
Permission Sets. - Select Permission Sets under Users.
- From Setup, in the Quick Find box, type
-
Create New Permission Set:
- Click the New button.
- Label: Enter
View Account Fields - API Name: This will auto-populate as
View_Account_Fields. - Description: Enter
Permission to access all Account fields - Leave the "License" field as "None" or select the appropriate license if your organization requires it for specific permission sets. For most field-level permissions, "None" is sufficient.
- Click Save.
Step 2: Enable ‘View All Fields’ Permission on the Accounts Object
After creating the permission set, you will be directed to its detail page.
-
Access Object Settings:
- On the 'View Account Fields' permission set detail page, scroll down to the "Apps" section (or use the "Find Settings..." search bar at the top of the permission set page).
- Click on Object Settings.
-
Select Accounts Object:
- Find and click on Accounts in the list of objects.
-
Edit Object Permissions:
- Click the Edit button.
-
Set Field Permissions:
- Scroll down to the "Field Permissions" section.
- Locate the column header View All Fields.
- Check the checkbox next to View All Fields for the Accounts object. This will automatically select "Read" access for all fields on the Account object.
- Important Note: This step specifically grants "View All Fields" which typically provides read access to all fields on the object. If you also need to grant edit access to all fields, you would check "Edit All Fields" as well. For this specific request, only "View All Fields" is needed.
- Click Save.
Step 3: Assign the Permission Set to Your User Record
-
Return to Permission Set Detail:
- From the 'View Account Fields' permission set detail page, click on Manage Assignments (located at the top or bottom of the page).
-
Add Assignment:
- Click the Add Assignments button.
-
Select Your User:
- A list of active users will appear. Locate your user record in the list. You can use the search bar if there are many users.
- Check the checkbox next to your user name.
- Click Assign.
-
Confirmation:
- You will see a confirmation message indicating that the permission set has been assigned successfully.
- Click Done.

Comments
Post a Comment